![Realtair RGB Green Box Logo.jpg]](https://help.realtair.com/hs-fs/hubfs/Realtair%20RGB%20Green%20Box%20Logo.jpg?height=50&name=Realtair%20RGB%20Green%20Box%20Logo.jpg)
The Special Condition is a new feature in Sign which allows users to save a list of predefined special conditions unique only to the Agent’s office. Once saved, the agent will be able to select and add from the saved list of Special Conditions to the campaign being created.
This is currently available for our users in Queensland and Contract form campaigns. Soon this new feature will also be available to other regions of Australia and other form templates.
Step-by-Step Guide
1. Each office will need to set up a list of special conditions under their Office settings. To do this, go to your Office Settings and click the "Add Special Conditions" tab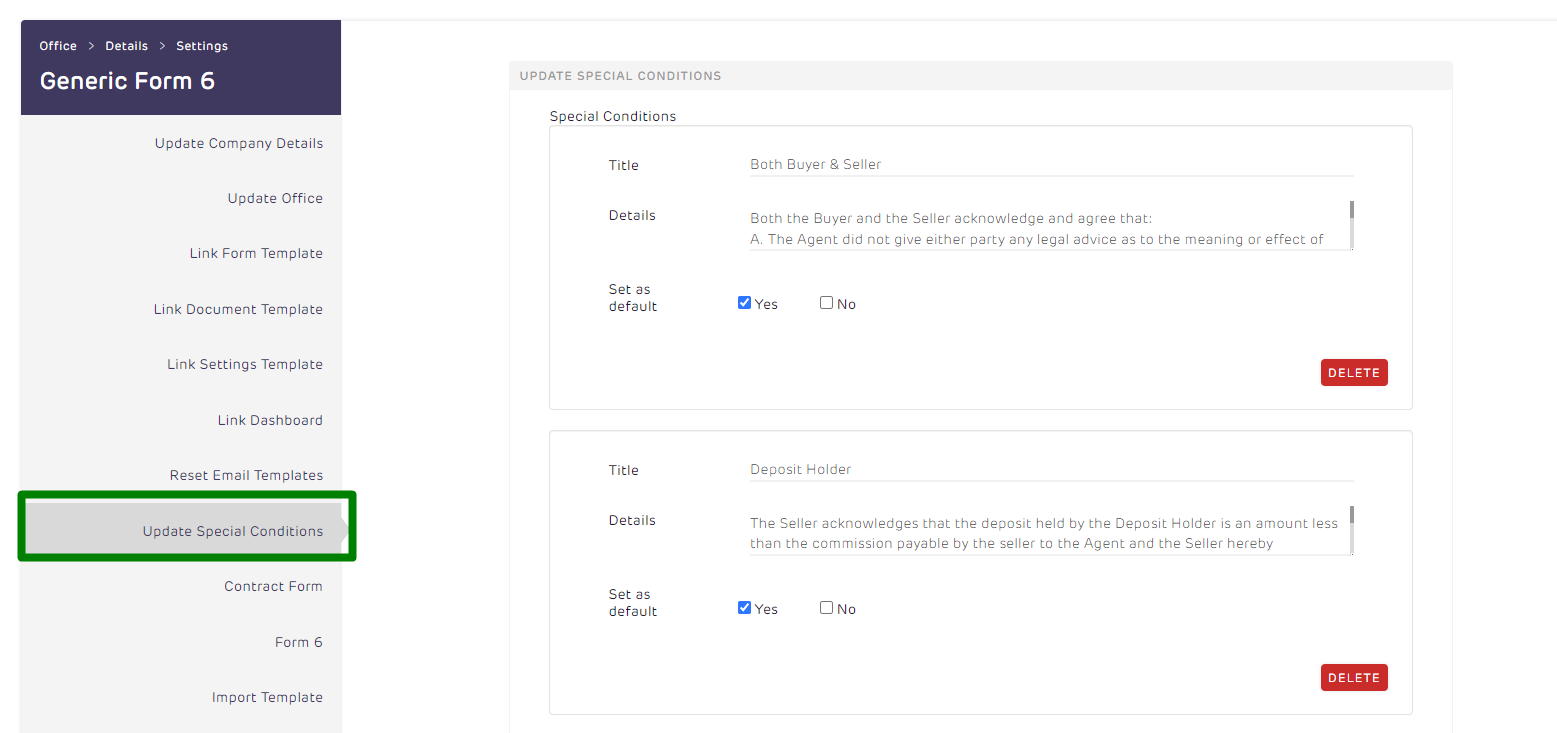
2. Once on the tab, there are three buttons found. These are: a) Add another; b) Delete; c) Add Special Conditions. To save a special condition, first set the number of Special Conditions that will be added by clicking the “Add another” button.
3. Once the number of Special Conditions has been set, fill in the required information under Title and details (1 tile is equivalent to 1 Special Condition), and once done, click the “Add Special Conditions” button to save.
4. Once all the Special Conditions are finalised and saved on the Office settings, a success message will be displayed and the saved list will appear on the left side of the list builder on the Online Form under Special Conditions.
From here, you can proceed to add Special Conditions to your campaign.
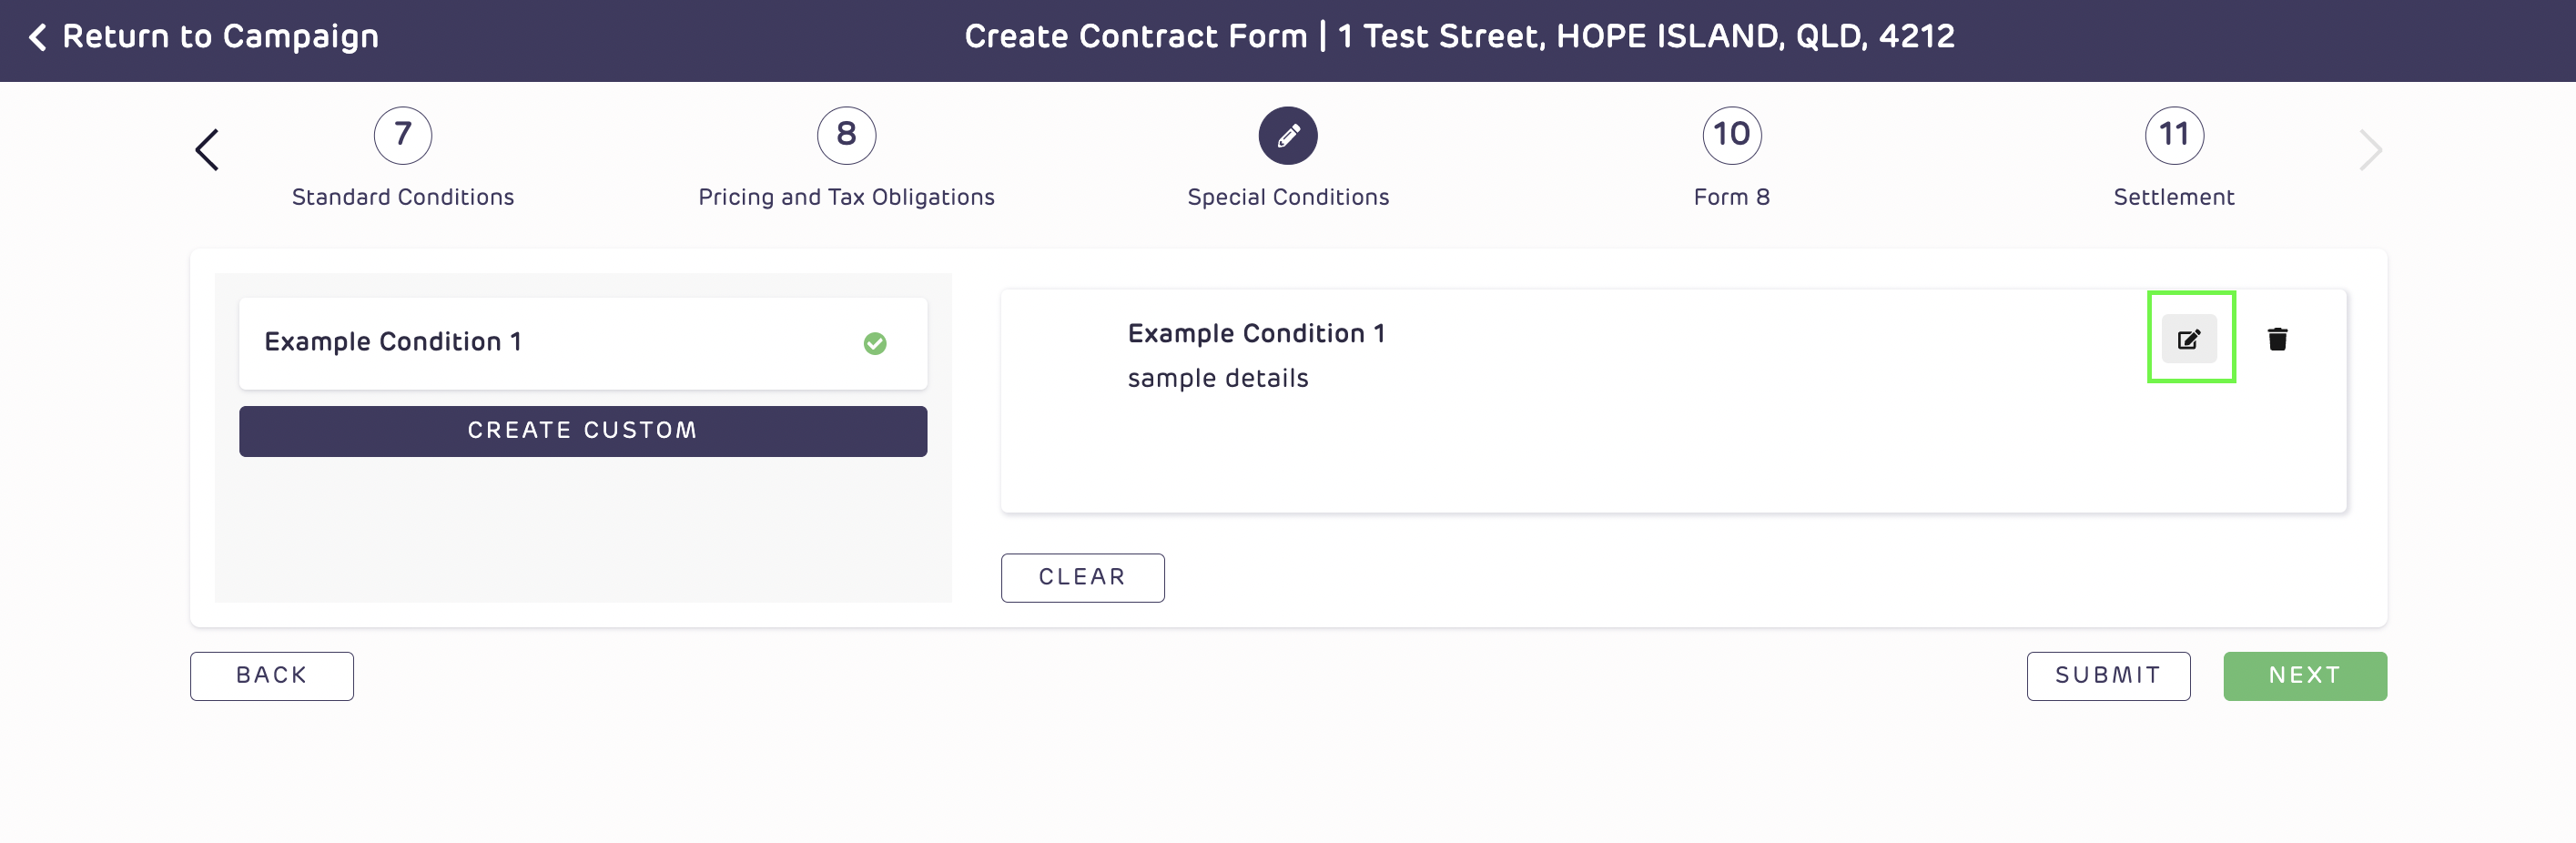
5. To add Special Conditions to your campaign, click on the “+” button found inside the tile of the chosen Special Condition. Once you have selected some special conditions, you will see the added special conditions dropping on the right side of the panel. 
6. A checkmark will appear on the selected Special condition to indicate that condition has been added.
7. You may update the information in the selected Special Condition to include dates or property address by selecting the Edit pencil. “![]() ”.
”. 
8. Once the edit button has been selected, a menu will appear, which displays a field containing the contents of the selected Special Condition, simply click into this field to edit the content.
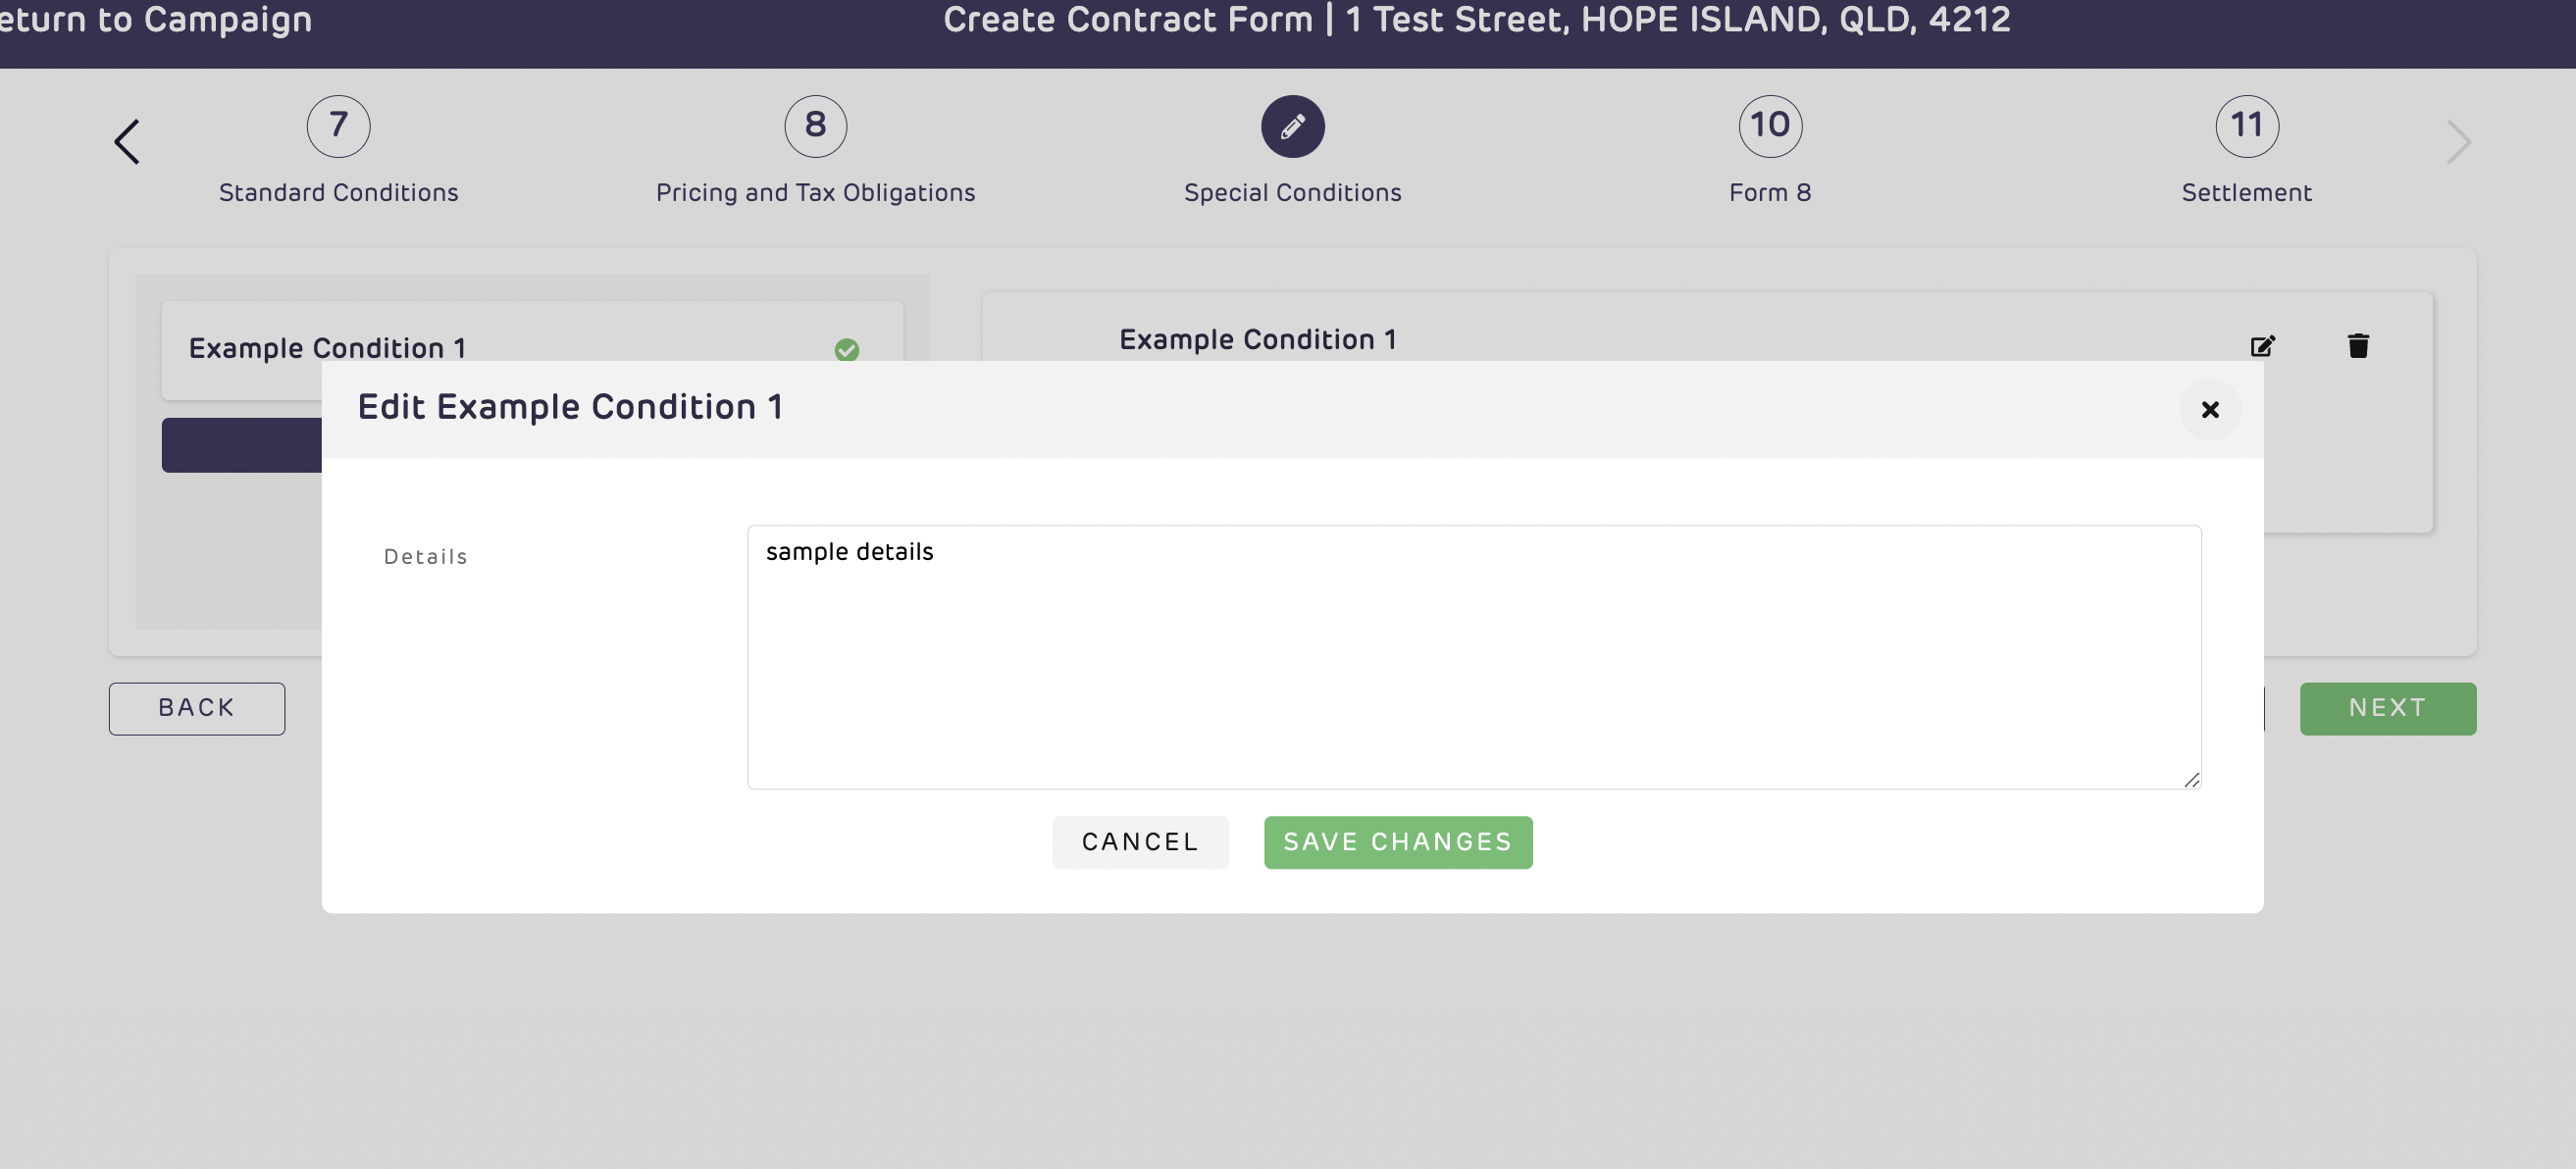
Once the edits are complete, click the “Save changes” button to submit the changes on the selected Special condition. The added changes should be reflected on the right panel.
Another feature we have added is the ability to create special conditions that are excluded from the pre-saved list set up in the office settings. To create these Custom Special Conditions, scroll over the list found on the left side to see the “Create Custom” button
After clicking the “Create custom” button, a window will appear and display two fields, title of the Custom Special Condition and the details of the special condition that will be available on the generated contract form.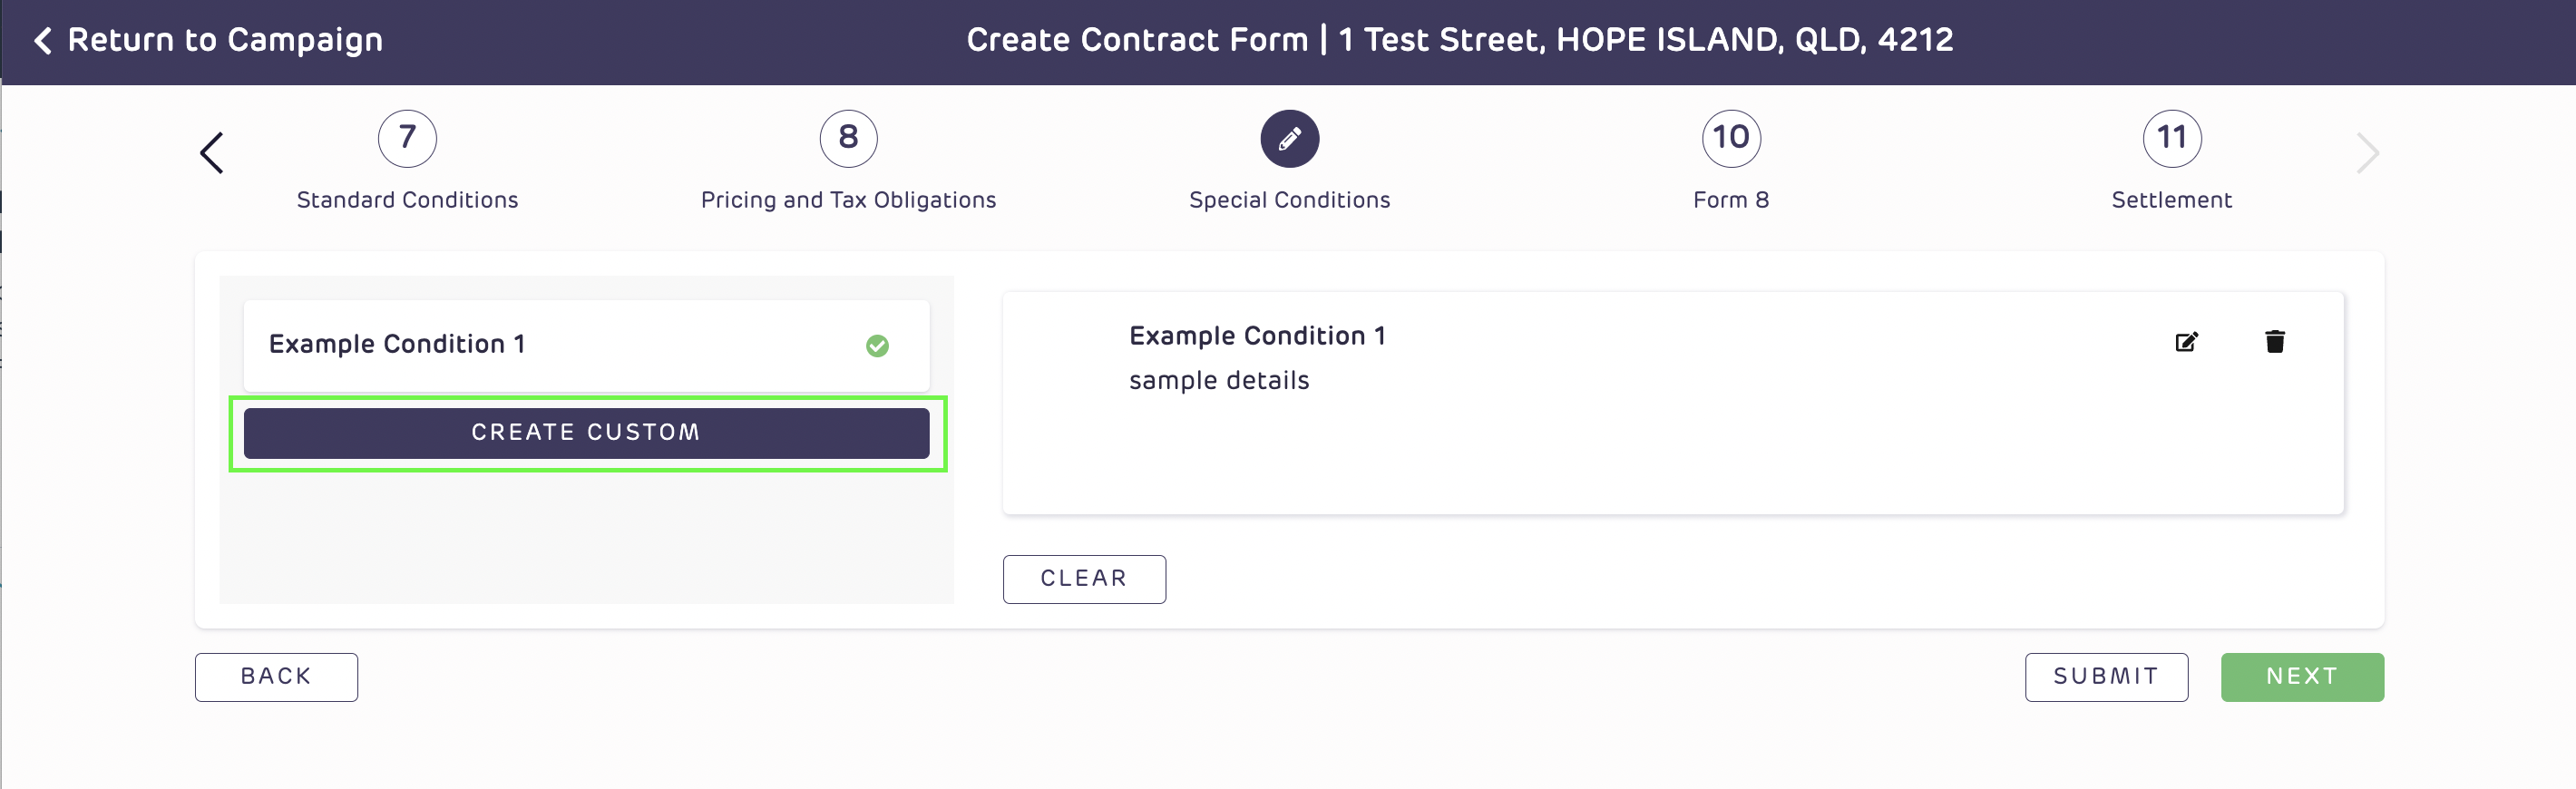
Once you are done adding the necessary information, click “Save” and the custom special condition will automatically appear on the right side of the list.
Should you wish to remove a special condition from the list on the right, simply click the Delete button.
If should you wish to remove all special conditions from the list on the right, click the Clear button instead.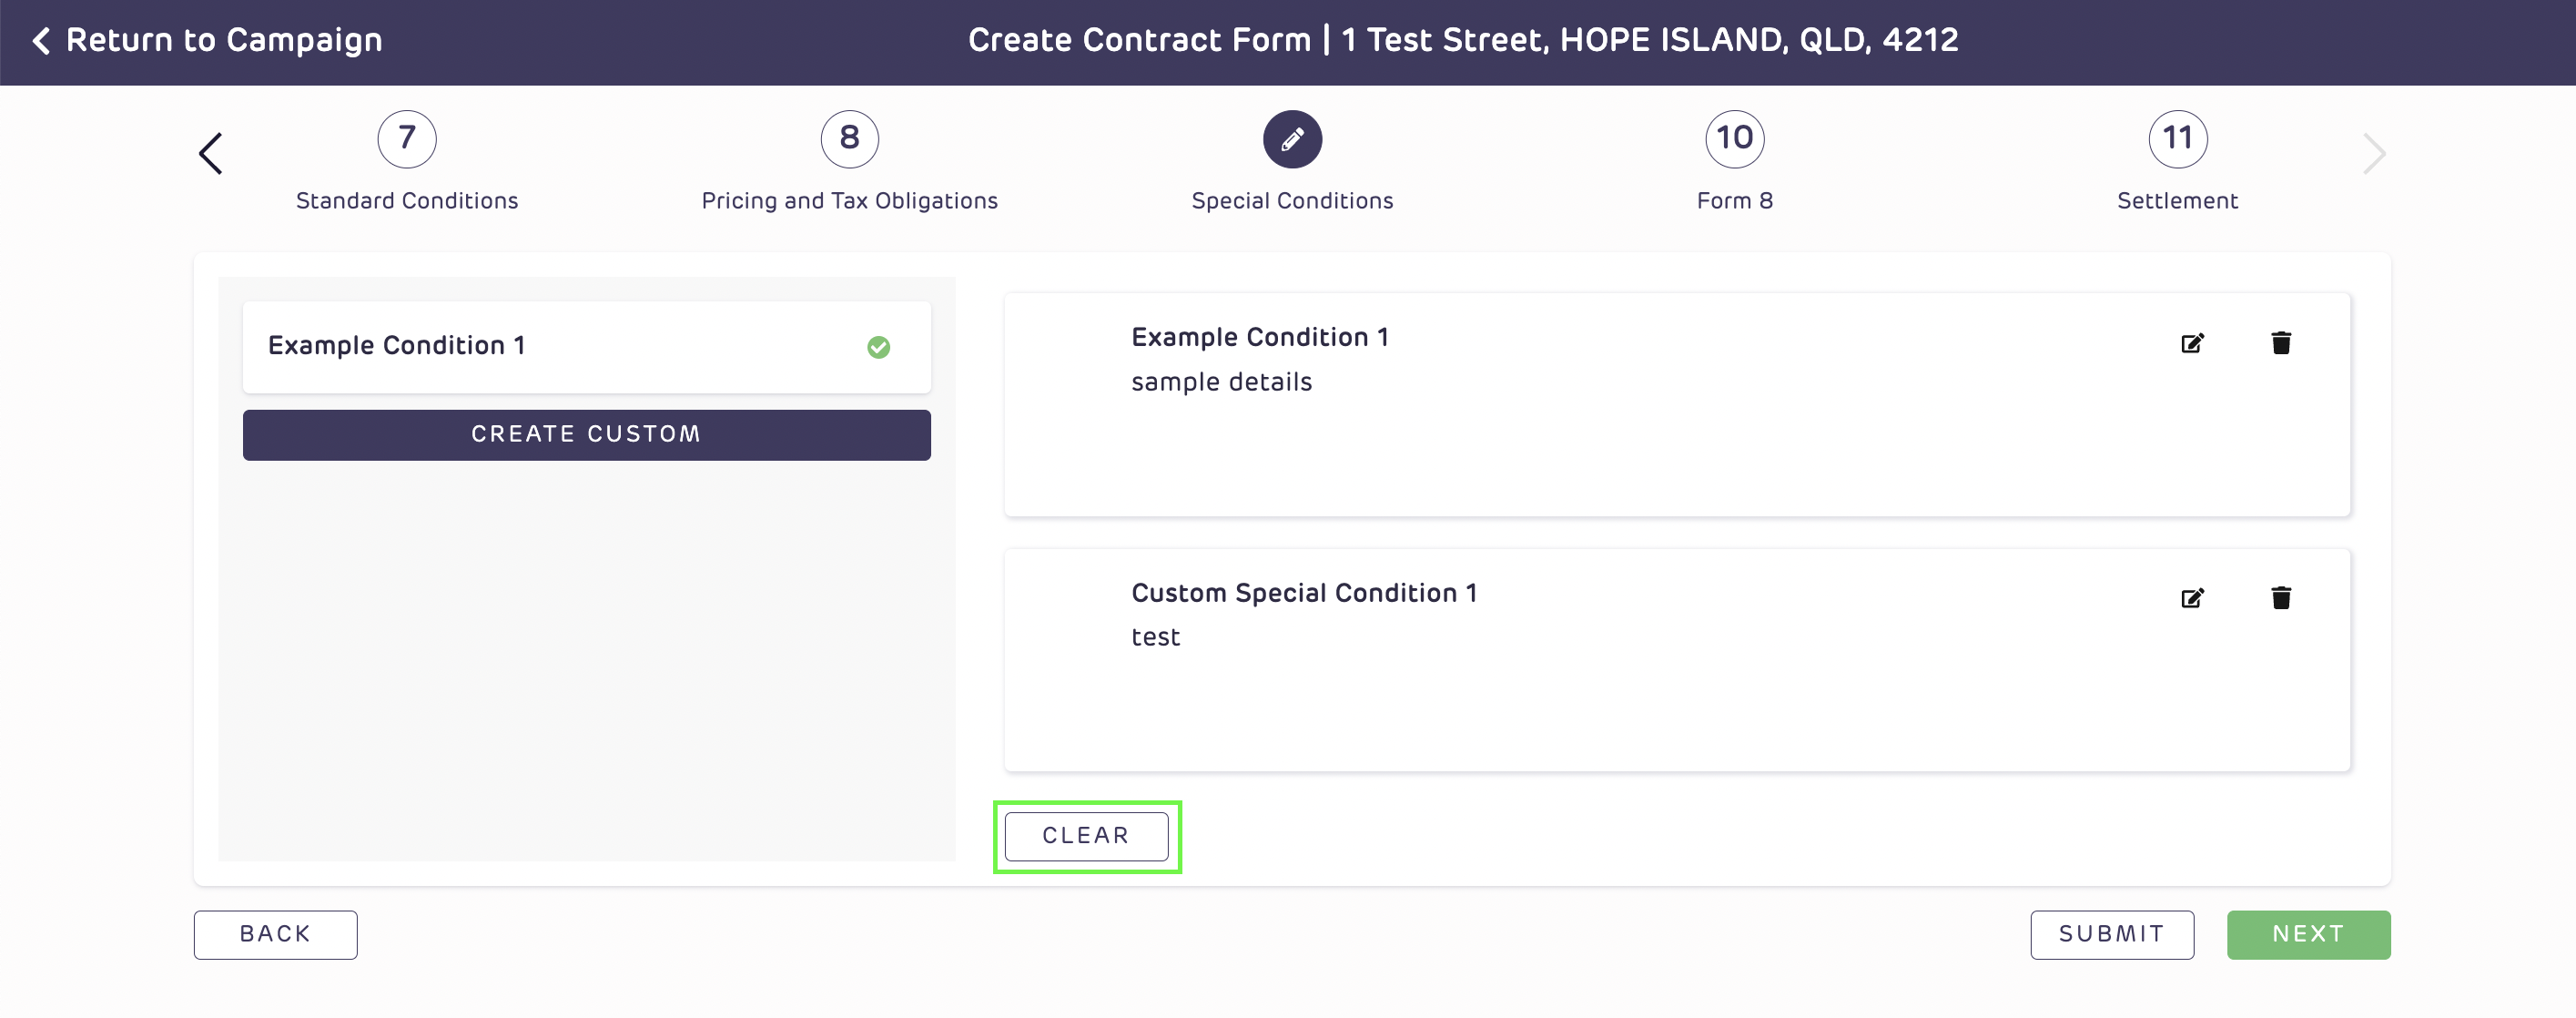
Once, the required special conditions are available on the right side of the list, click the Submit button to generate the contract form or “Next” to complete all other questions found on other online form.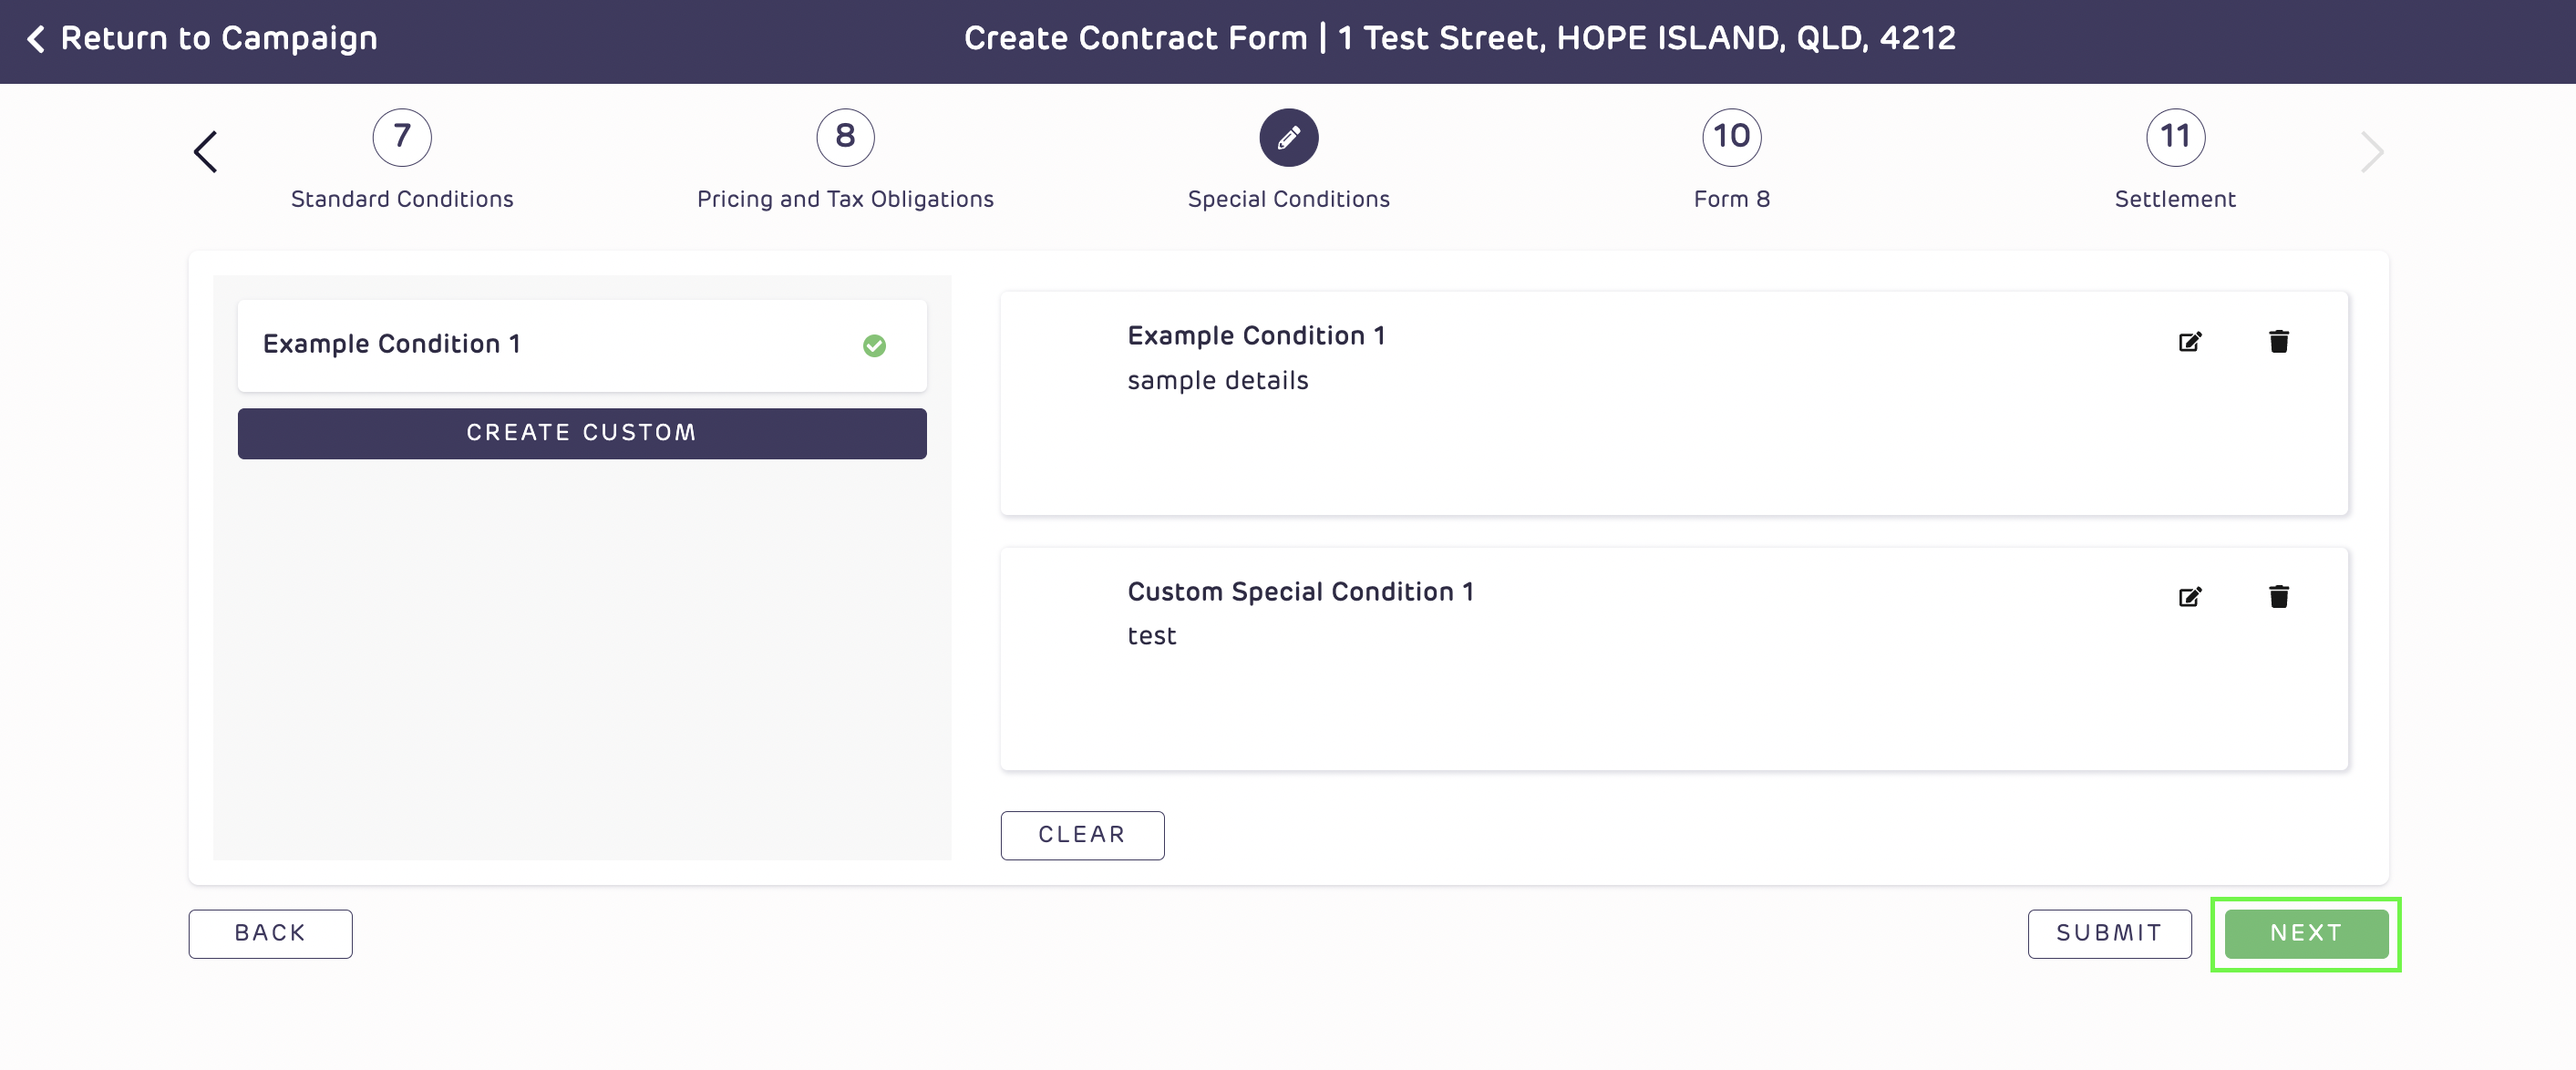
Once submitted, all details for the added special conditions will be displayed under the Special Conditions section in the generated Contract form.
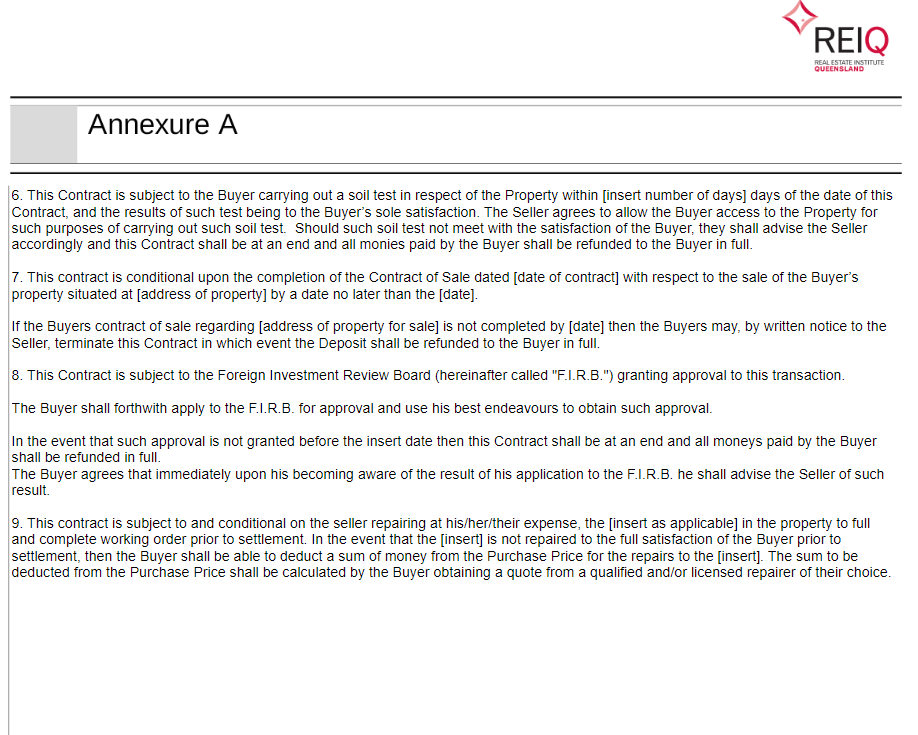
In the case that multiple special conditions were added to the list. The other special condition details will be dropped in under “Annexure A” to accommodate the number of conditions and details relevant to the agent’s campaign.