![Realtair RGB Green Box Logo.jpg]](https://help.realtair.com/hs-fs/hubfs/Realtair%20RGB%20Green%20Box%20Logo.jpg?height=50&name=Realtair%20RGB%20Green%20Box%20Logo.jpg)
Here are the things that you can do on My Group
- Add your logo & colours to the Group Homepage in Buy.realtair (Whitelabel)
- Modify your URL within Buy.realtair
- Manage your Office details
- Manage the Members of your Office
- Manage your member’s details
- Connect your Office to your CRM
Add your logo & colours to the Group Homepage in buy.realtair (Whitelabel)
Whitelabel is where you can add your branding, logo and colours within the Realtair Platform
If you have Group admin access, you can set up the Group Whitelabelled Homepage from the My Group menu. Follow the procedure below:
How do you know if you have Group Admin access:
Within buy.realtair.com and you head over to your profile, and if you can see and manage everything under “My Group” it means you have Group Admin access.
If you only see what office they are part of - then you only have agent access.
1. Ensure the whitelabel colors have already been set up in Accounts. You will know that you have whitelabel set up if you login to Realtair Platform, and your logo appears on the top left hand corner.
 . Standard View - No Whitelabel Set up
 . Whitelabel Set up - logos and colour are adjusted to office’s branding
2. f you don't have whitelabel set up but you wish to, or you wish to adjust the colours / logos - you may send a request for assistance to support@realtair.com for the whitelabel colors setup.
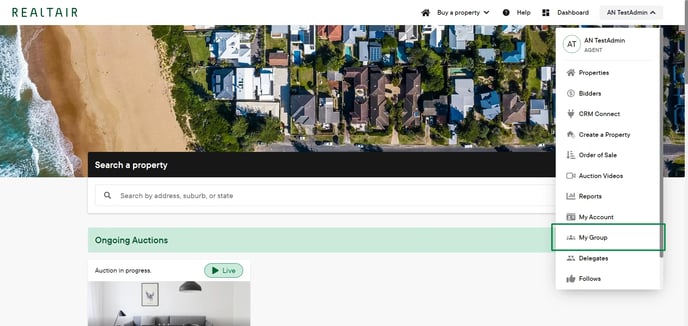
3. In your buy.realtair page, click your name on the top right hand corner and click “My Group”.
4. Click Sync Whitelabel settings button. If a message appears saying “No Whitelabel update found in Accounts,” you can disregard it as it simply means that the colors have already been synced.
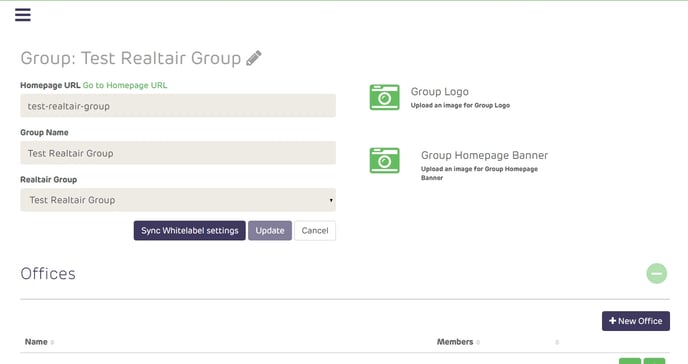
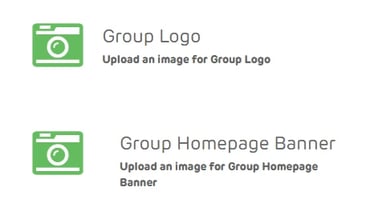
5. Upload the Group logo and Group homepage banner image with what you would like buyers to see when visiting your group’s buy.realtair homepage.
Modify your URL within buy.realtair
This is an URL specific to your group that you can share with prospective buyers and use throughout any campaign. This URL redirects buyers to the homepage where it only show properties under your group.
1. In your buy.realtair page, click your name on the top right hand corner and click “My Group”
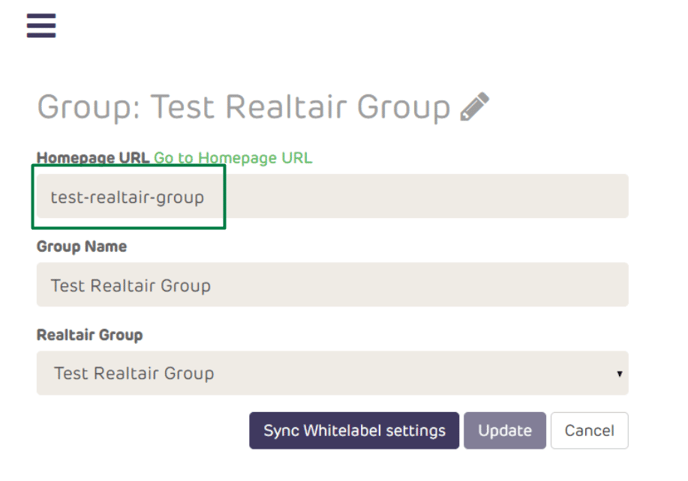
2. Modify the auto-generated URL if necessary.
3. Please note that when accessing the URL at the group level, "/group" is included before the group name. This addition is to show that this is a whitelabeled group homepage.
E.g. if the group name is "test-realtair-group," the URL would appear as buy.realtair.com/group/test-realtair-group.
4. Click the Go to Homepage URL to verify that the Whitelabel has been applied and set up correctly.
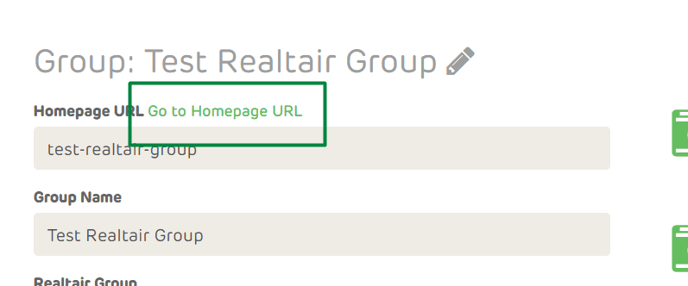
5. Remember to save the Whitelabelled Homepage URL; it's the link to share with the buyers, displaying only the properties listed under your group.
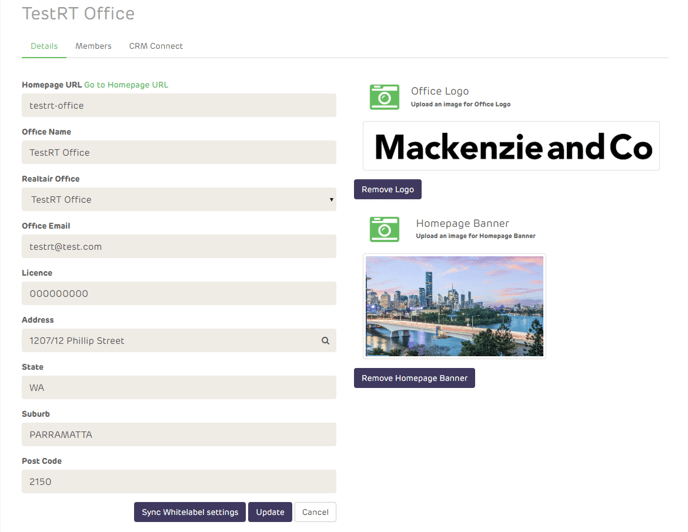
Manage your Office details
In the My Group menu, you will see the list of Offices you are part of. You have the option to edit or create/delete(if Group admin) an Office.
Please note that it is highly encouraged to reach out to Realtair Support via support@realtair.com to edit, create, or delete offices to prevent misalignment issues.
-
Click on the pencil icon across your office.
- From here you can see the office details, and add/change the office logo. You also have access to Members, CRM Connect pages.
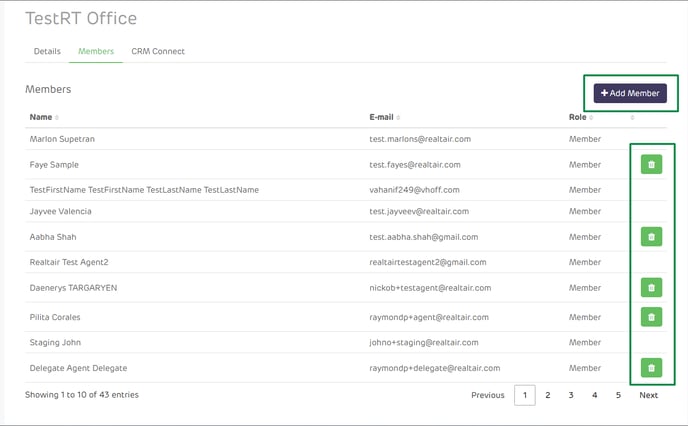
Manage the Members of your Office
To add a new member to your office, you can invite them by clicking the +Add Member button. To remove a member, simply click the Delete icon.
Note: Adding a member will only add it to Sell and Accounts, meaning they wont have access to Pitch & Sign.
Please reach out to your Customer Success Manager or our support team via support@realtair.com to add additional users to your office.
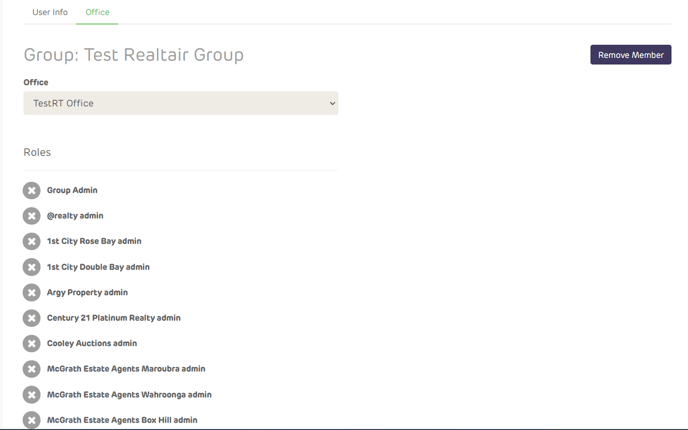
Manage your member’s details
1. By clicking on the member, you will be redirected to the member’s User info where you can edit the name, add contact numbers, make the member an auctioneer, add a license, and upload Agent/Auctioneer photo.
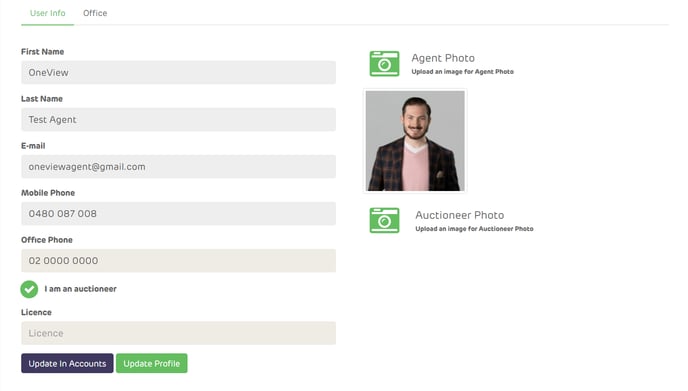
2. Additionally, clicking on the Office tab will let you manage what Office a user is part of and assign admin access.
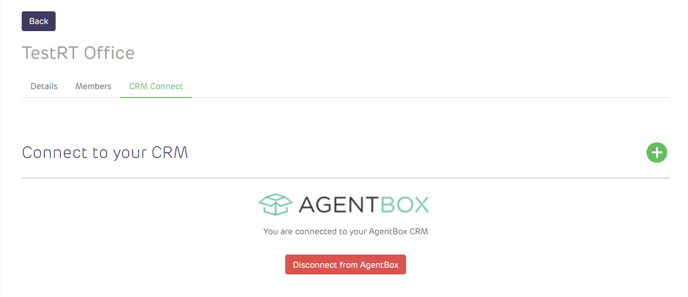
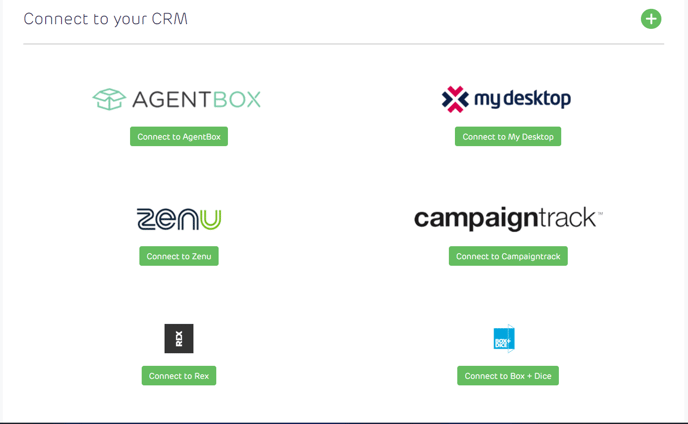
Connect your Office to your CRM
Your CRM should be connected as part of the initial set up process, if not you can set up with below steps:
-
Get your Office’s Agency ID from your CRM provider.
-
Go to the CRM Connect tab in your Office settings, browse from the list of supported Sell CRM providers and click the Connect to <CRM> button.
3. Enter the provided Agency ID by your CRM provider and click Connect.
4. You will see a similar image below when you get connected to your CRM provider. Your members should be able to get details from CRM when activating a Sell property.