![Realtair RGB Green Box Logo.jpg]](https://help.realtair.com/hs-fs/hubfs/Realtair%20RGB%20Green%20Box%20Logo.jpg?height=50&name=Realtair%20RGB%20Green%20Box%20Logo.jpg)
Getting Started
- From your dashboard, open an existing campaign.
- Select the Sign tab.
- Click Create, and choose SignAnything from the menu.
You will be prompted to select an existing preset or create a new document.
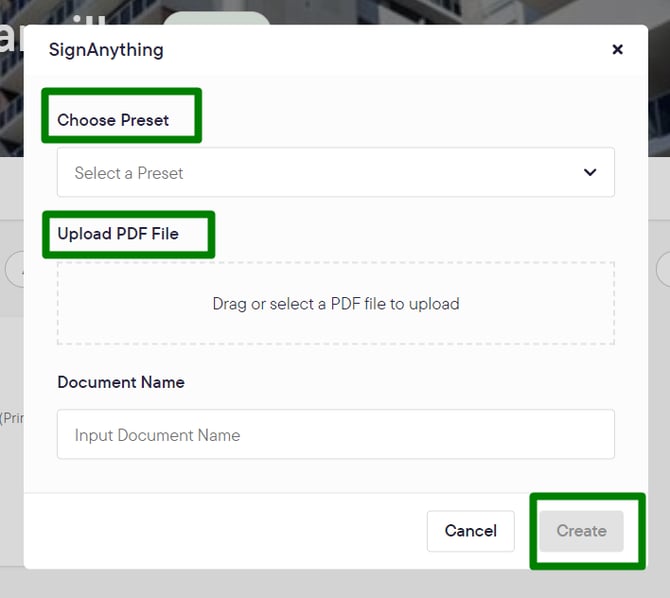
How to Create a New SignAnything Document
Step 1: Upload Your PDF
- Select the option to create a new document.
- Drag and drop your PDF file into the uploader.
- Give your document a name (e.g. "Auction Reserve").
- Click Create.
Your document will open in the SignAnything editor, with a preview on the right and signer fields on the left.
Step 2: Add Signers
- Click Add Signer to add as many signers as you need.
- By default, Signer 1 is the agent. You can overwrite these details if the agent does not need to sign.
Step 3: Add Fields to the Document Place fields onto your document for signers to complete.
- Signer Name: Click the + icon next to Signer Name and place it on the document.
- Custom Text: Click the A icon to add a custom text box for details like a property address or reserve price.
- Signature: Click the + icon next to Signer to add a signature field.
- Date: Add a date stamp next to the signature if required.
Pro Tip: When creating a preset, rename your custom text fields (e.g., from "Custom Text 1" to "Property Address"). This makes it easier to complete the form later.
You can also allow a signer to complete a field themselves by ticking the Allow signer to fill out box.
Step 4: Save as a Preset
- Once you have placed all your fields, click Save.
- To reuse this layout, click Save as Preset.
- Give the preset a name (e.g., "Auction Reserve Preset") and confirm.
How to Use a Preset
- When you create a new SignAnything document, select your saved preset from the list.
- Give your new document a unique name (e.g., "19 Bunyip Street Auction Reserve").
- The document will open with all the fields you previously set up.
- Fill in the required details on the left-hand side.
- Send the document for signing.
You have now learned how to create a SignAnything document and save it as a preset for future use.