![Realtair RGB Green Box Logo.jpg]](https://help.realtair.com/hs-fs/hubfs/Realtair%20RGB%20Green%20Box%20Logo.jpg?height=50&name=Realtair%20RGB%20Green%20Box%20Logo.jpg)
Getting Started
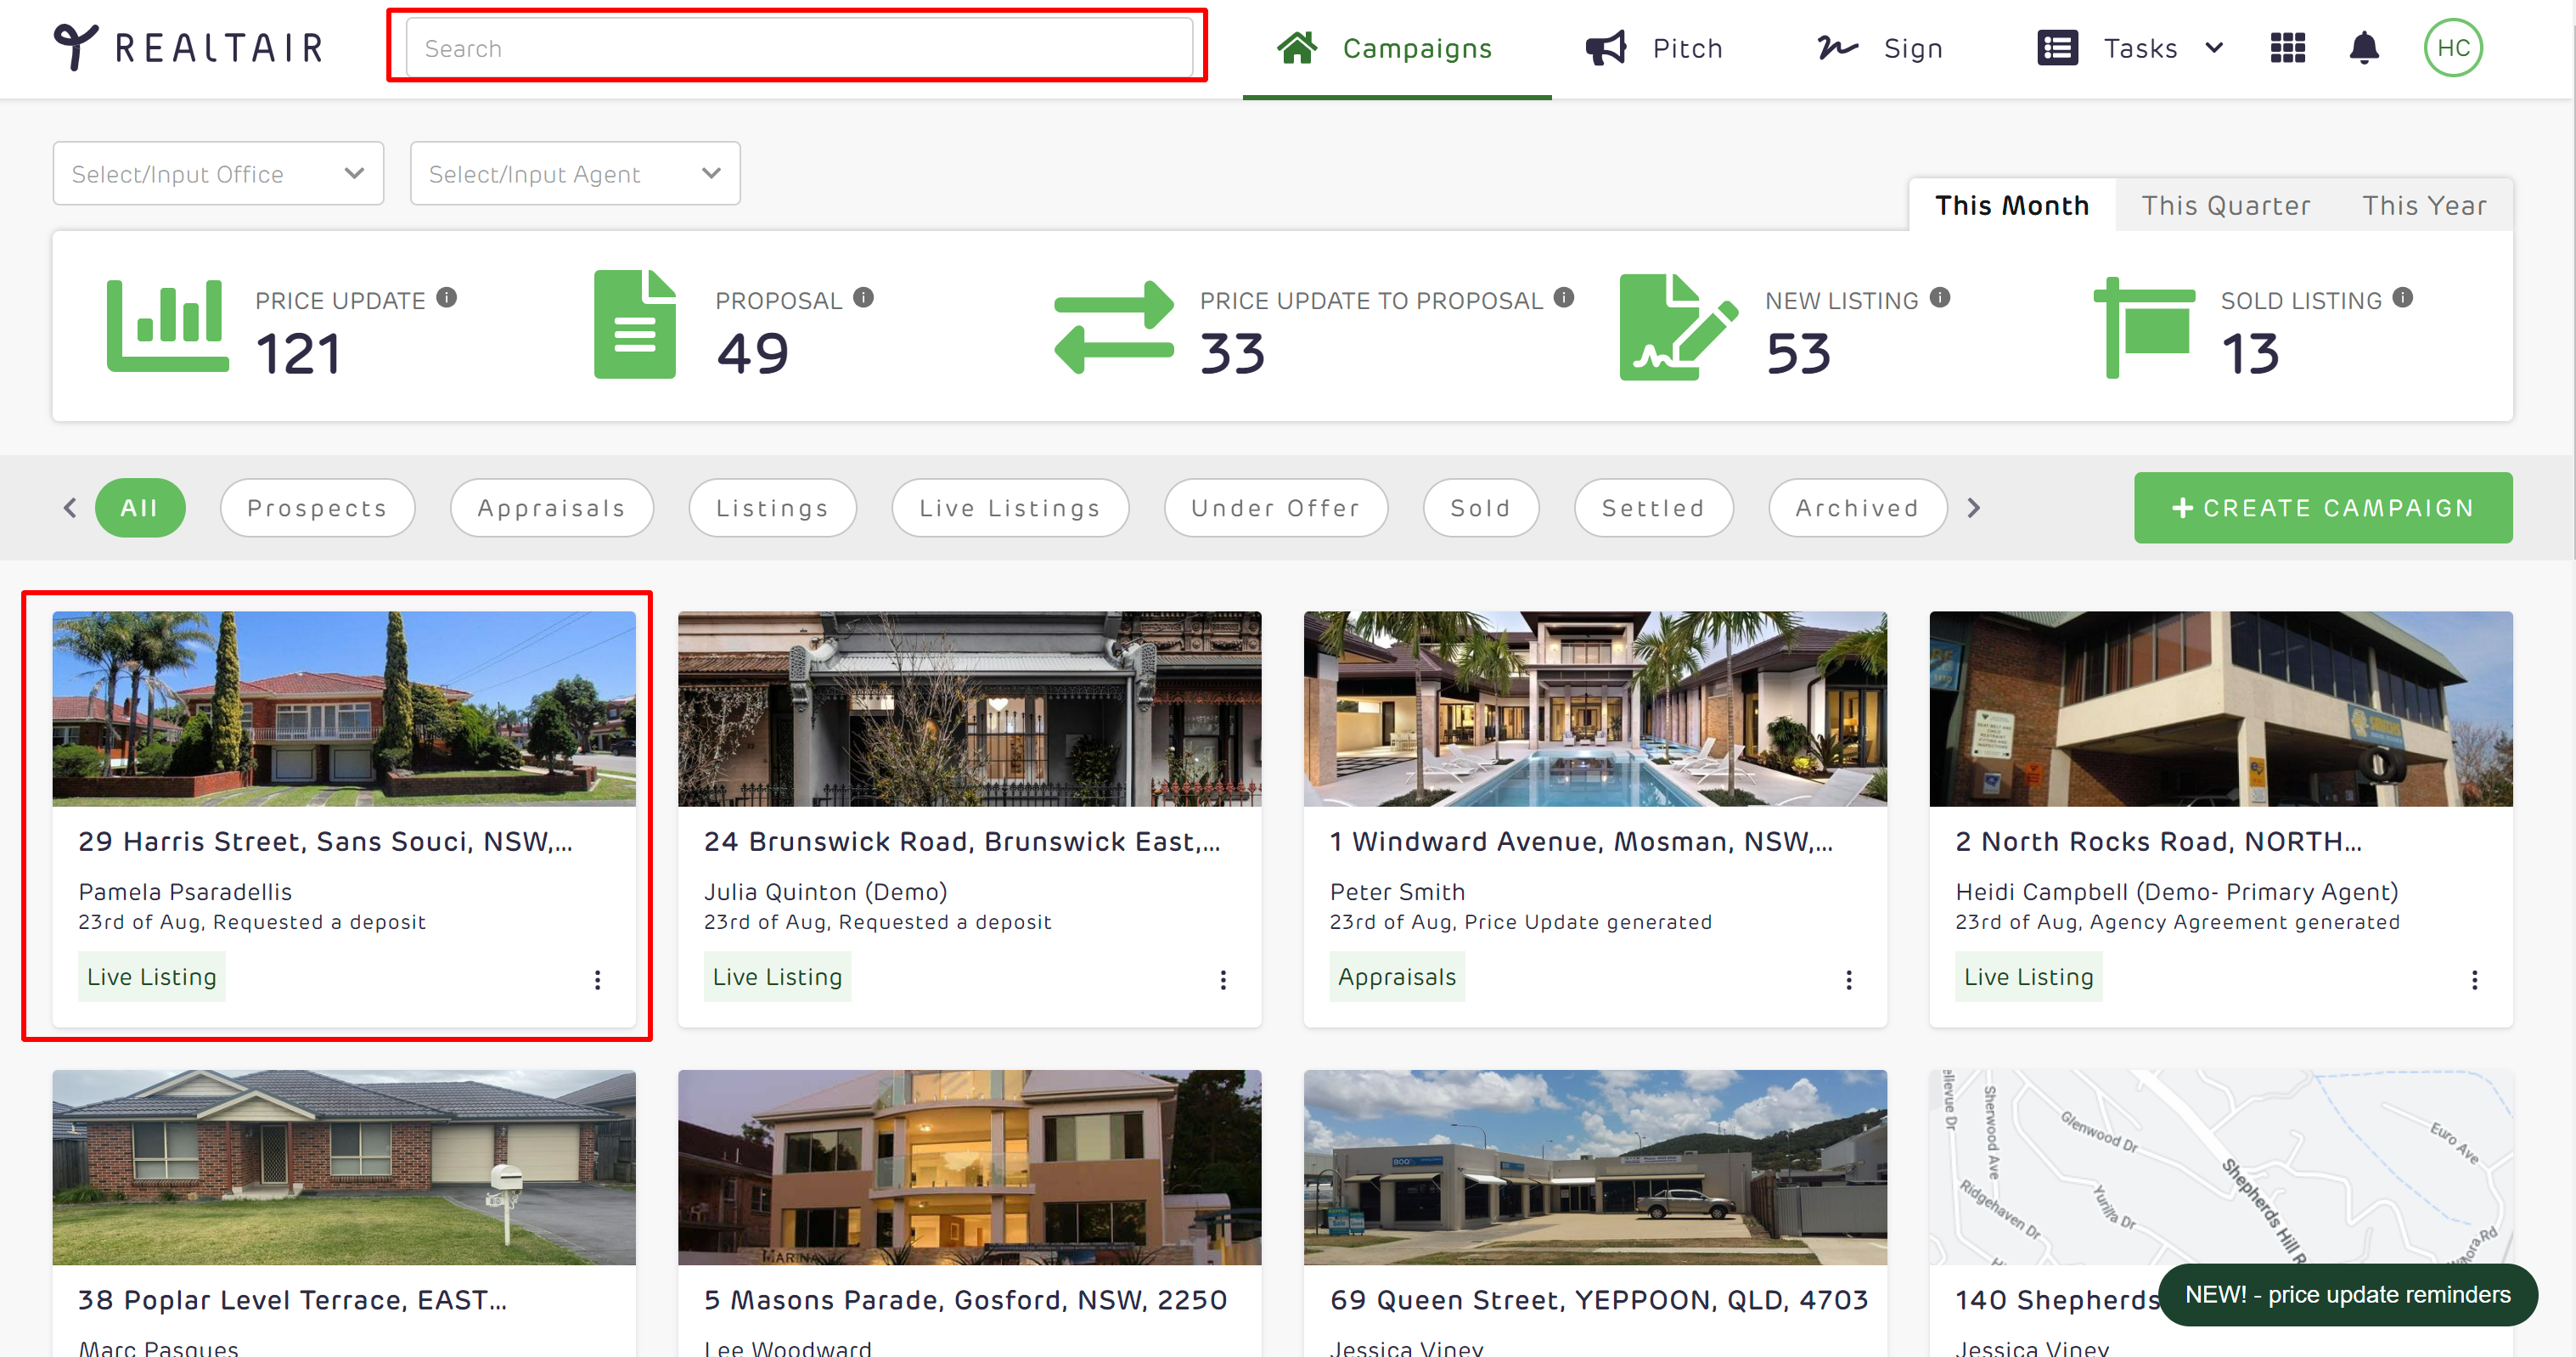
- Go to the Realtair dashboard at
https://app.realtair.com/dashboard. - Search for the property address to find your campaign.
- Select the correct campaign to open it.
Create the Contract
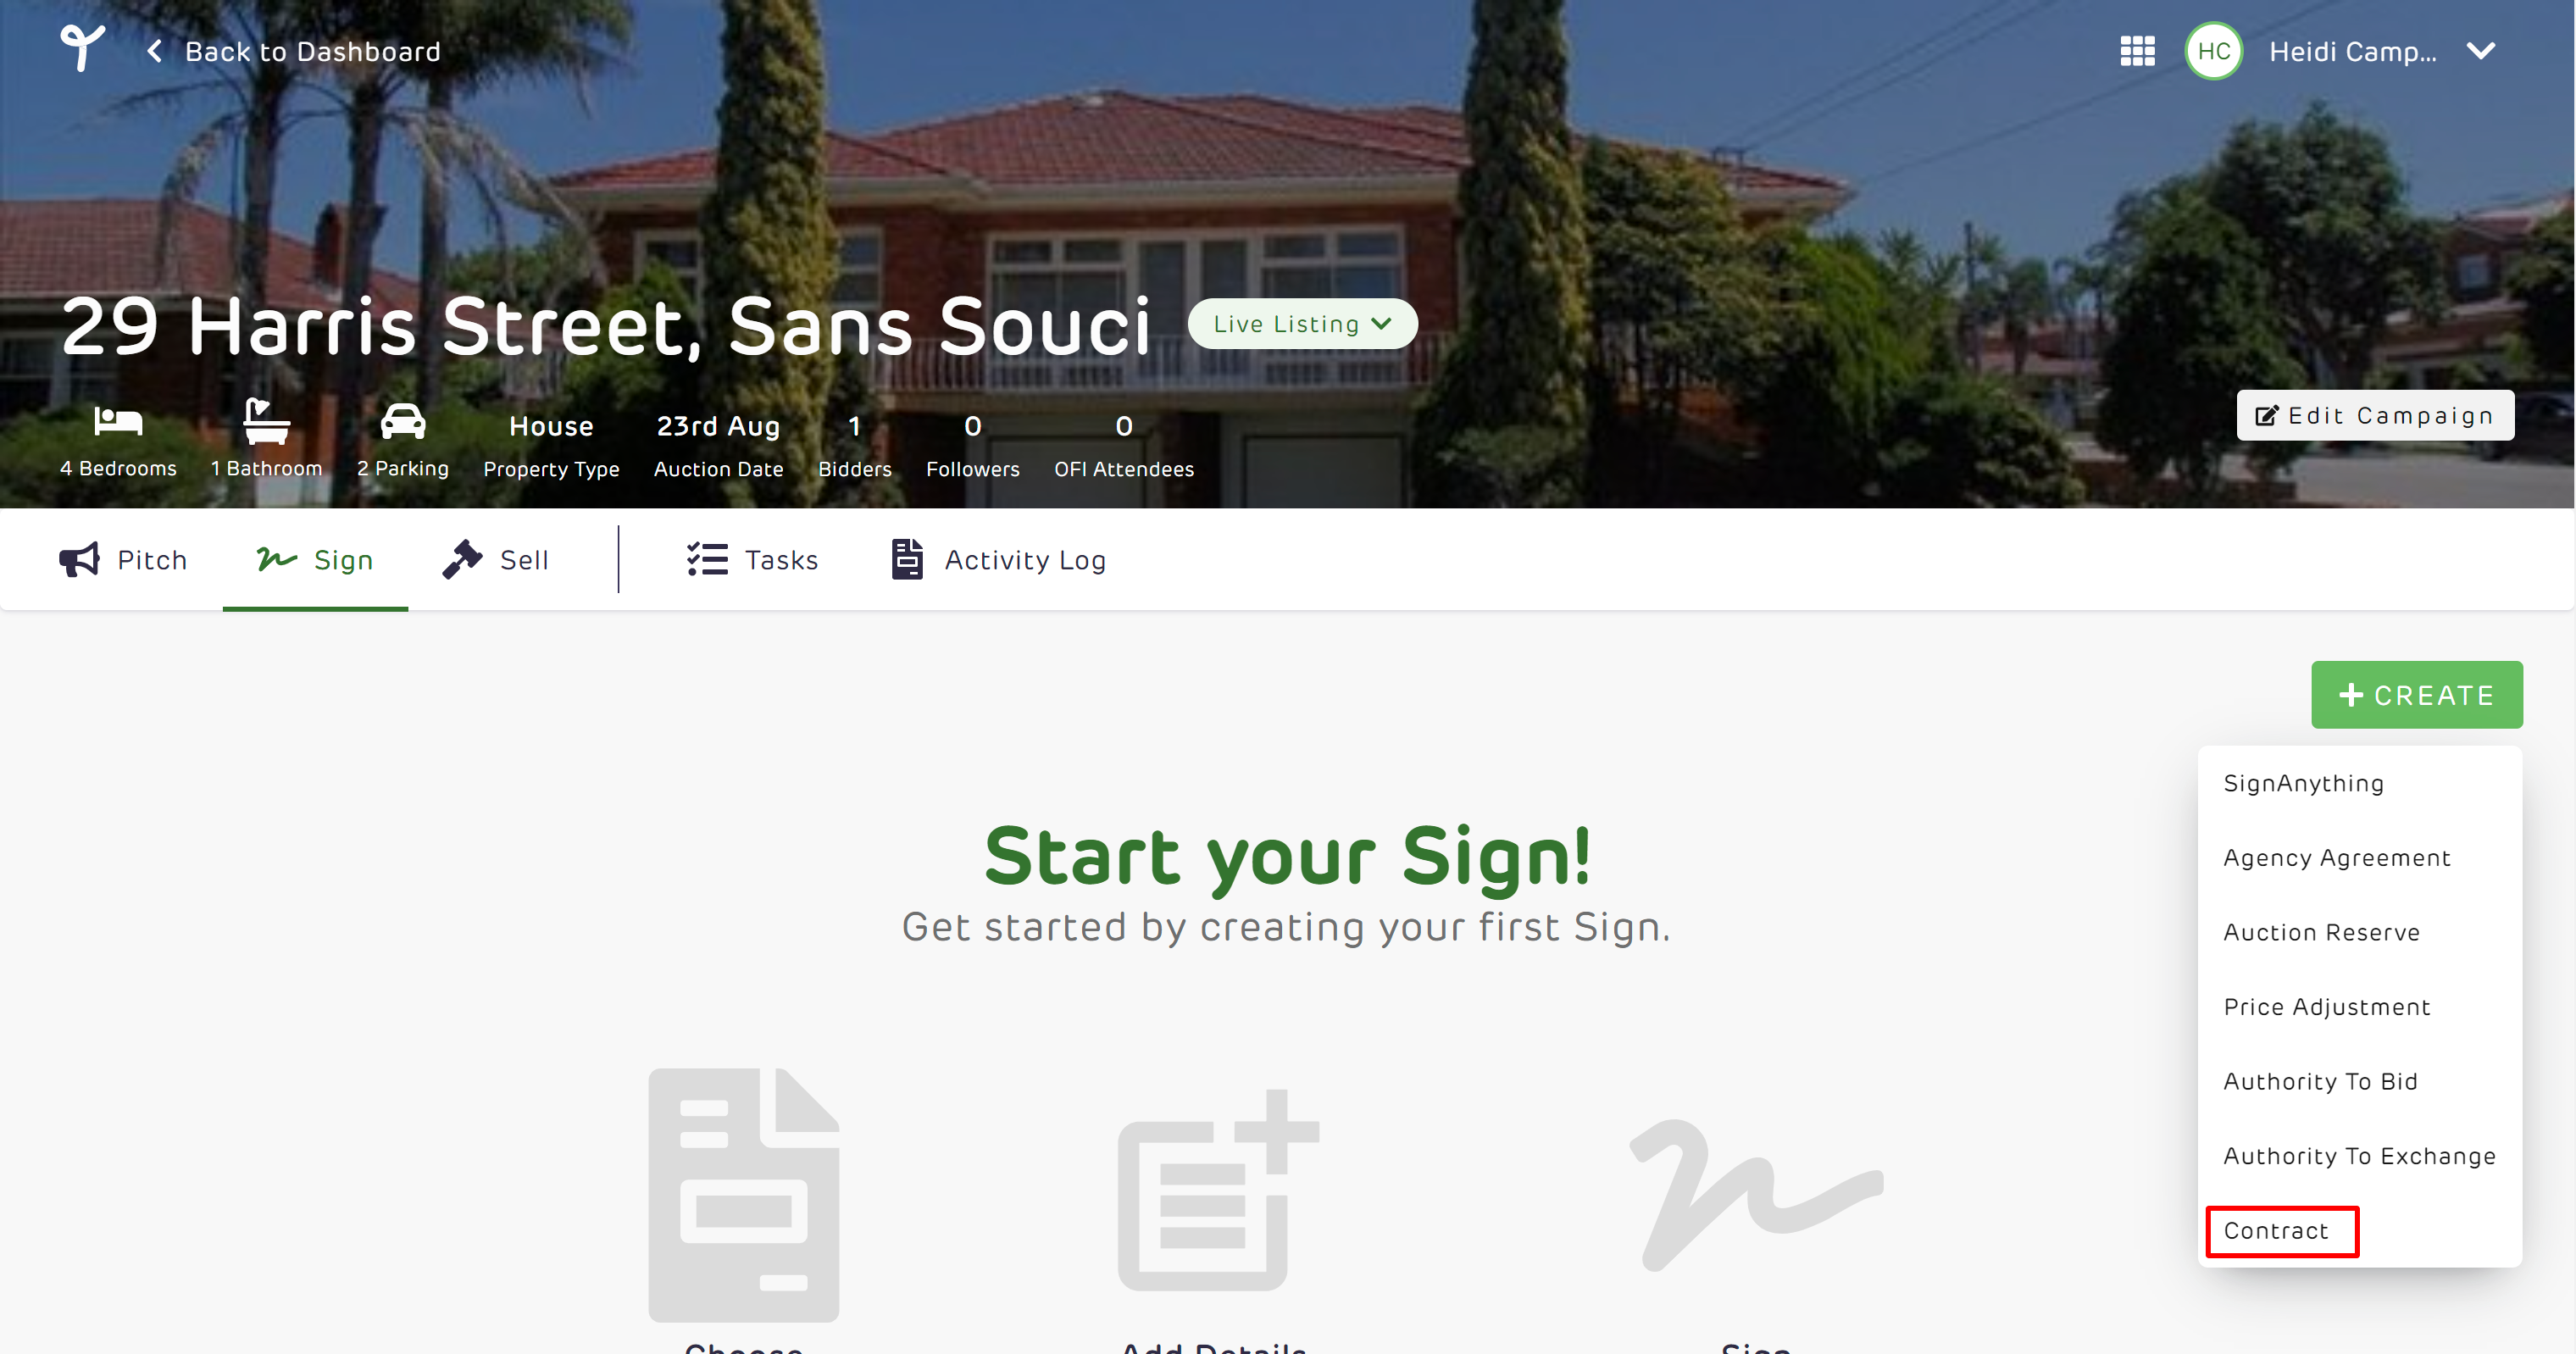
- Select the Sign tab.
- Click Create to begin.
- Create and upload the contract document.
Text boxes for key details will auto-populate on the contract. You can click and drag these boxes to move them.
Remember to click Save after making any changes.
Add and Edit Details
Start by filling in the required information for the sale.
1. Add Vendor Details
- Vendor details are auto-populated from the Agency Agreement.
- To add another vendor, click Add Vendor.
2. Add Purchaser Details
- Enter the purchaser’s information.
- To add more purchasers, click Add Purchaser.
- These details will automatically fill the fields on the contract's front page.
3. Add Sale Details
- Enter the final sale price.
- Select the deposit amount. The balance will be calculated for you.
Note: The contract's front page will always show a 10% deposit amount, as required by legislation. This happens even if you enter a different percentage in the information menu.
4. Add Solicitor Details
- Vendor Solicitor: These details are usually pulled from the Agency Agreement. If you need to add them manually, open Vendor Solicitor in the document fields and click the + button to place a text box on the contract.
- Purchaser Solicitor: Add the purchaser’s solicitor details into the provided fields. This information will appear on the front page of the contract.
5. Add a Buyer's Agent (if applicable)
- If the purchaser has a buyer's agent, you can add their details.
- Open Buyers Agent in the document fields.
- Click the + button to drop the text box onto the contract.
Customise the Contract
You can add custom text, strike through clauses, or use tick boxes.
- Text Box: Click the A icon. Select a location on the contract. Use the menu on the left to add your text. This is useful for special conditions or exclusions.
- Strikethrough: Click the strikethrough icon. Hover your mouse over the text you want to rule out, such as a settlement clause.
- Tick Box: Click the tick box icon. Insert a tick to mark any additional inclusions.
Send a Copy to a Non-Signer
You can send a final copy of the exchanged contract to your accounts team or other stakeholders.
- Before signing, click the Send Copy icon in the left-hand menu.
- Add the recipient's email address.
- To add multiple recipients, separate each email address with a semicolon (;).
- You can check who you’ve added by clicking the Status icon.
Recipients will receive an email with a link to the signed contract once it is exchanged.
Request Signatures
When you’re ready to collect signatures, follow these steps.
- Click the Signature icon.
- Choose to Send Remotely or Sign in Person.
A warning will appear if mandatory fields, like the sale price, are missing. You must complete these fields before requesting signatures.
To send remotely, select the Remote option. Tick the parties you want to send the request to. You can send to purchasers first and then vendors; they don’t have to be sent at once.
Once all parties have signed, their signatures will appear on the single contract document. The contract is not considered exchanged at this point.
Exchange the Contract
After all signatures are on the document, you can finalise the exchange.
- The Save button in the top right corner will change to Exchange.
- Click Exchange when you are ready to execute the contract.
- A warning message will ask you to confirm. Click Yes.
Clicking 'Yes' officially dates the contract and completes the exchange. The date on the contract will be the day you click the exchange button.
Check Status, Download, and Print
The icons on the right-hand side help you manage the document.
- Status icon: Shows the document status, including when a signature was requested and who has signed. It also shows any cc'd recipients.
- Download icon: Click this to download a PDF of the contract.
- Print icon: Click this to print the contract.
-
Search for the address of your campaign and select the campaign
-
Select the Campaign, select the Sign tab, and click “Create”
-
Create and upload the contract.

Textbox will auto-populate on the contract front page and signing page You can move text boxes by clicking & draggng the next bo *Remember to click save*
Add Vendor details:
Note: Vendor details are auto-populated from the Agency Agreement
Should you have multiple vendors simply click add vendor to add their details

Add Purchaser details:
-
Add in purchaser details
-
Should you have multiple purchasers simply click add purchaser to add in their details
-
As you add in purchaser details this will fill in the document fields on the front page of the contract
-1.webp?width=670&height=357&name=image%20(1)-1.webp)
Add Sale details:
-
Add in the sale price
-
Select the deposit amount
-
Once the deposit amount is selected, the balance will automatically be calculated
The Deposit amount on the contract will always be 10% on the front page as per legislation (even if the agent enters a 5% on the left-hand side on the Document Information menu)
-1.webp?width=670&height=356&name=image%20(2)-1.webp)
Add Vendor Solicitor (In most cases it should already be on the front page of the contract, and pulled from the Agency Agreement)
-
Add in vendor solicitor details
-
Should you have a vendor solicitor appear in the contact, you can input those details
-
To add in vendor solicitor details, open up vendor solicitor in document fields and click + button to drop in the text box on the contract
-1.webp?width=670&height=352&name=image%20(3)-1.webp)
Add Purchaser Solicitor
-
Add in purchaser solicitor details
-
This information will be filled in on the front page of the contract
-1.webp?width=670&height=357&name=image%20(4)-1.webp)
Add Buyers Agent (if applicable)
-
Should the purchaser have a buyers agent, you can input those details
-
To add in buyers agent details, open up buyers agent in document fields and click + button to drop in the text box on the contract
-1.webp?width=670&height=336&name=image%20(5)-1.webp)
Need to add something else?
There are 3 custom options - text box, strikethrough and tick box
-
Select A to add in a blank text box, click on the contract where you would like this to go, scroll down on your left-hand side to fill in the text in that text box (Adding special conditions or changing settlement clause, adding including/ exclusions)
-
Click on the strike-through and hover your mouse over the settlement date on the contract and rule that out e.g. striking out settlement clause on front page
-
To tick any inclusions, simply click on the tick box and insert the tick in on additional inclusions
-1.webp?width=670&height=341&name=image%20(6)-1.webp)
How to send the signed copy to a non-signer (accounts team, admin team etc)
Apart from the automated email notifications sent to solicitors, vendors & buyers containing a copy of the exchanged contract, you also have the option to include additional recipients to receive the signed copy of the contract. This could include the admin team, accounts team, or anyone with a valid email address.
To get started:
-
Prior to signing the contract, click the send copy icon on the left-hand side menu
-1.webp?width=442&height=422&name=image%20(7)-1.webp)
-1.webp?width=565&height=290&name=image%20(8)-1.webp)
-1.webp?width=566&height=270&name=image%20(9)-1.webp)

When you are ready to send the contract for signing or sign in person click on the signature icon

Either send remotely or sign in person

If there are missing mandatory fields such as sale price there will be a pop up warning, you must complete the mandatory fields before signing the contract.
.webp?width=661&height=344&name=image%20(14).webp)
To send remotely click on remote options, tick who you would like to sign and send the signature request.
You can send to purchasers first then vendor if need be. You are not limited to sending to all parties at once.
.webp?width=670&height=351&name=image%20(15).webp)
.webp?width=670&height=351&name=image%20(16).webp)
Once all parties have signed, all signatures will show on one contract.
Note: the contract is not exchanged at this point
.webp?width=670&height=349&name=image%20(17).webp)
Exchanging:
-
Once all parties have signed, the save button in the top right-hand corner will change to exchange
-
When you are ready to execute the contract click on the exchange button
-
You will see a warning message asking if you are sure you want to exchange
-
Click yes
-
Once clicking yes, this will date the contract. Note: The date that will drop on the contract is the day you click exchange
-
The contract is now dated and exchanged
.webp?width=670&height=350&name=image%20(18).webp)
.webp?width=670&height=351&name=image%20(19).webp)
What is the Status icon:
This icon will show you the status of the document
-
When the signature is requested
-
If the signer has signed
-
and if you had entered a cc recipient address it will also show
.webp?width=670&height=372&name=image%20(20).webp)
How to download and print?
The last two options in the icon bar are download and print
.webp?width=670&height=351&name=image%20(21).webp)